Guide to testing Push
This is a self-paced guide to testing the Push platform as a new administrator. If you’ve signed up for a free account, this is a good place to start. Push provides 10 licenses on the free tier.
Prerequisites
To get started, you’ll need to:
Install the Push browser extension in a browser profile you use regularly.
Note: If you were the first administrator to sign up to Push, you would have been prompted to install the extension as part of the signup process.
Bookmark the Push demo site so you can test detection features such as SSO password protection and phishing toolkit detection.
Refer to our Help Center if you have questions, or contact us to talk to a human!
Step 1: Enroll your browsers
First things first. You’ll need to enroll your browser(s) in Push by installing the Push browser extension. We recommend testing with a browser profile you use regularly. The extension observes real-time activity, so if you install Push in a profile you never use, things will be pretty quiet on the platform.
A word about licensing: Push distinguishes between administrator and employee (end-user) accounts. Your free-tier licenses cover up to 10 licensed employees. Licensing is based on number of humans, not number of browsers, so you can install the extension on all the browsers you use for work.
Action steps:
Confirm that you’ve installed the Push browser extension.
If you need to install the extension, log in to the Push admin console and go to Employees. Select the icon to add an employee, then select Add manually. Add your name and email address.
You’ll receive an email with a link to install the Push extension.
Success state:
If the extension is installed and your browser is enrolled in Push, you should see your email address in the extension tray.
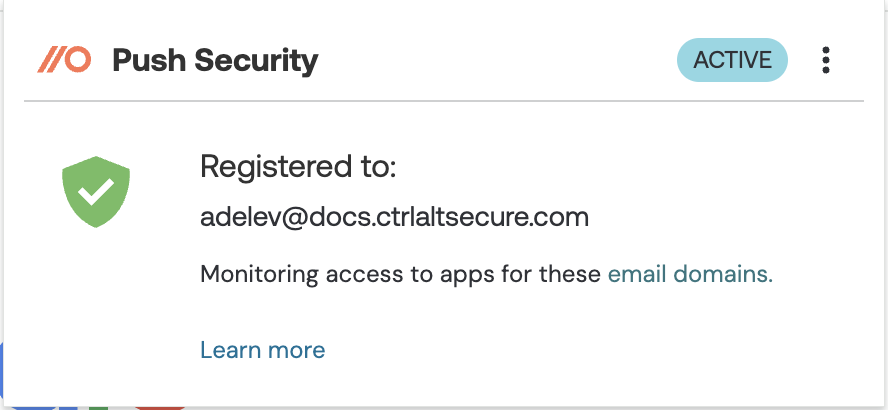
You will also see yourself on the Employees page. In the Browsers column, you’ll see your enrolled browser(s). You can also see enrolled browsers on the Browsers page, including when they were last seen by Push.
Step 2: Configure security controls
Push provides a collection of out-of-the-box security controls that you can configure in a couple of minutes. We’ll test them in step 3.
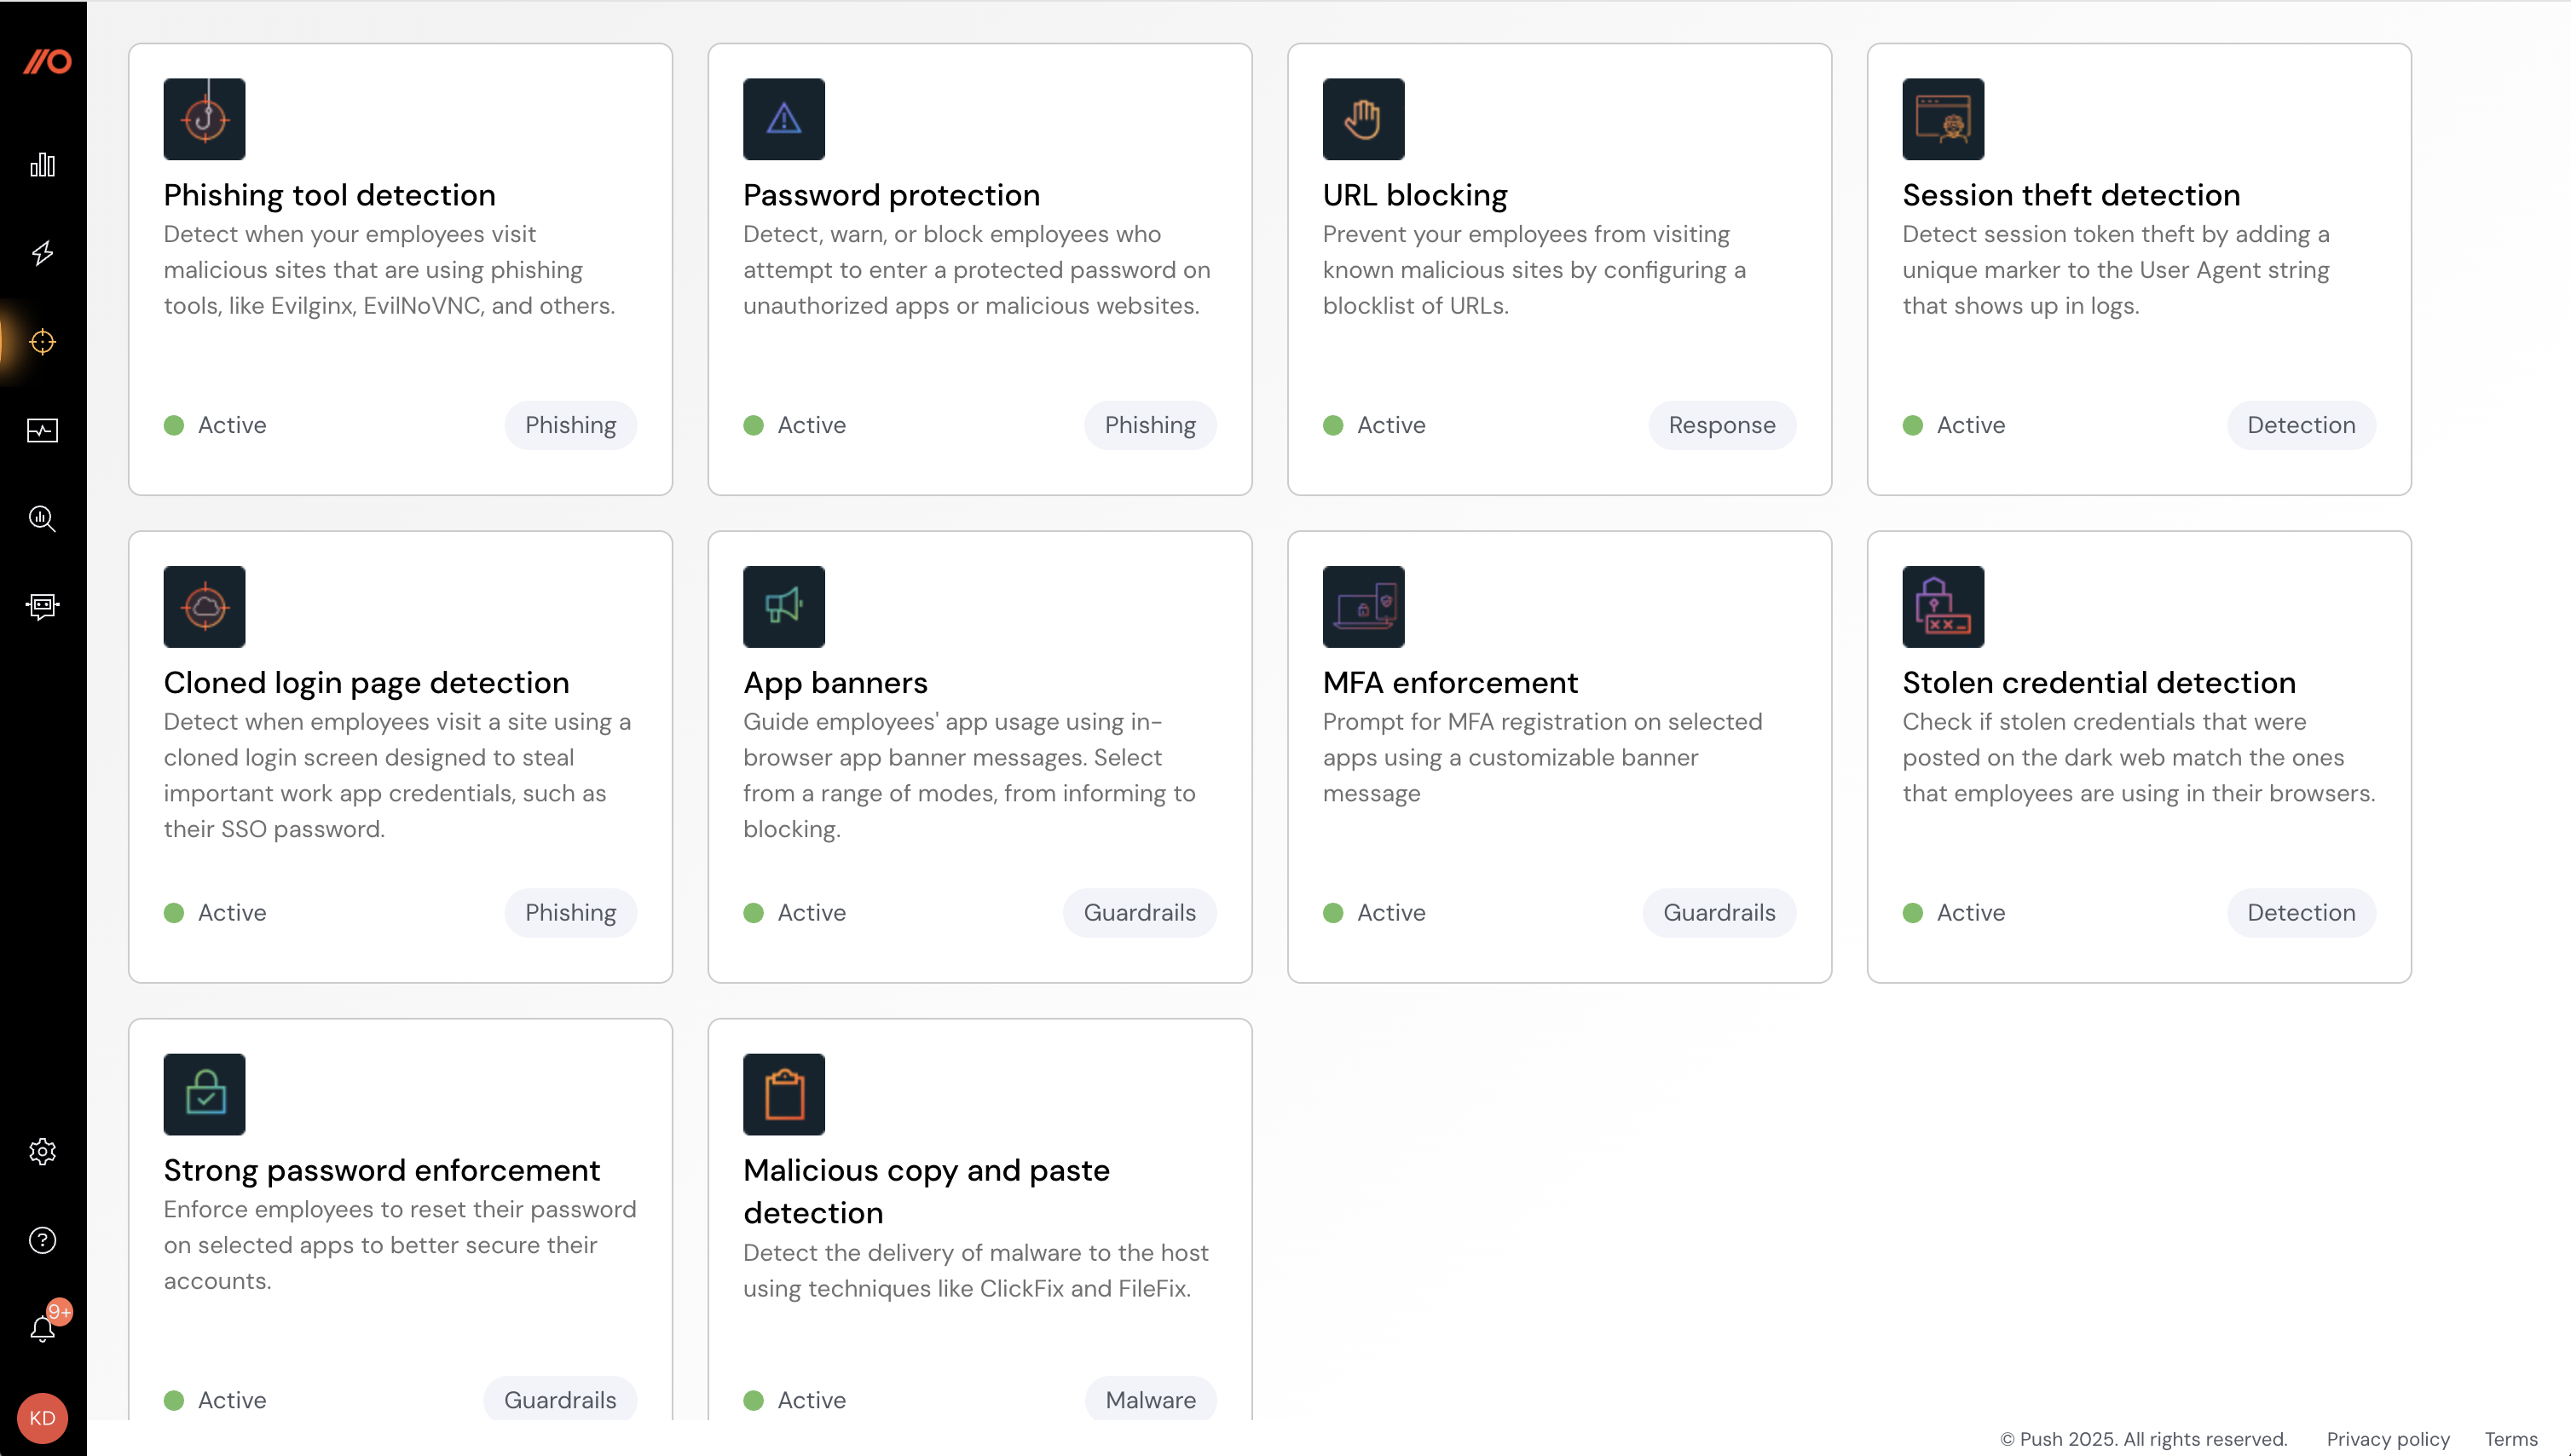
To configure controls, go to the Controls page in the admin console. Here are some recommended configurations to use when testing.
Configure phishing tool detection
Push detects when employees visit websites that are using malicious phishing tools such as Evilginx and EvilNoVNC, also called adversary-in-the-middle (AiTM) phishing toolkits.
Action steps:
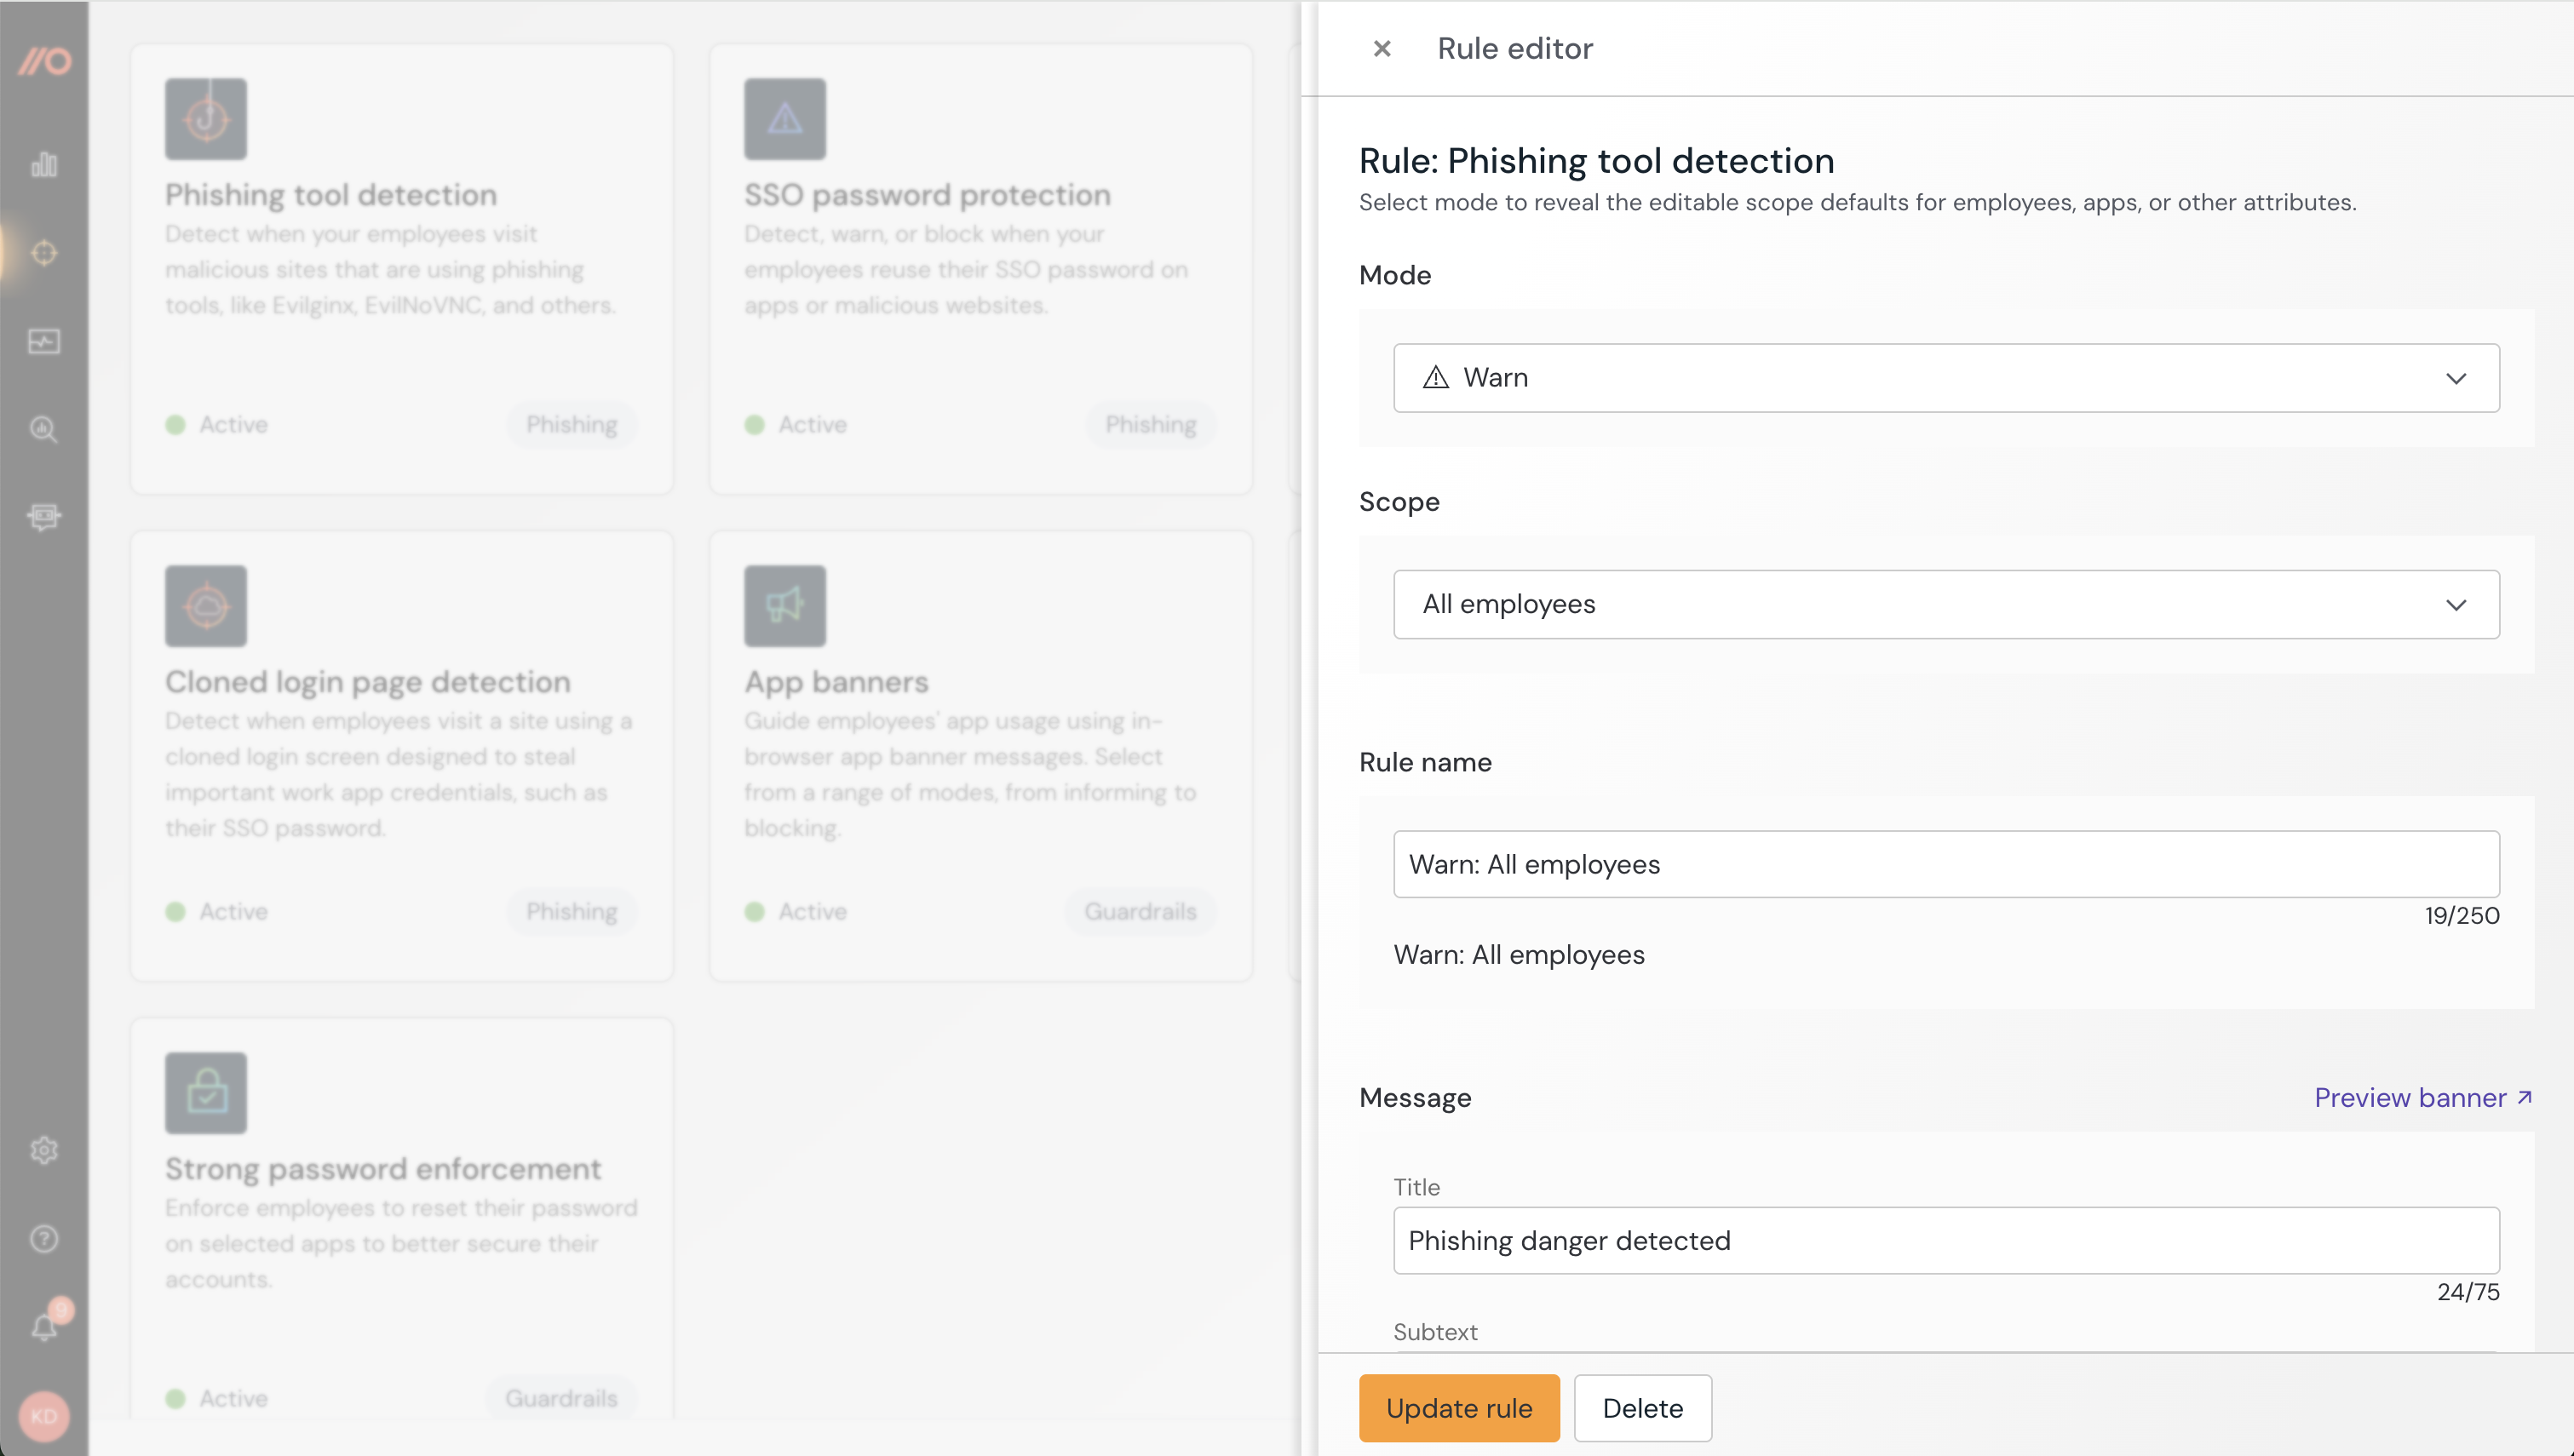
Select the Phishing tool detection tile on the Controls page.
Set the mode to Warn so test users can bypass the control if needed.
Optional: Configure a custom Message to employees with your own text.
Success state:
Configure SSO password protection
Push can warn or block employees from entering their corporate SSO password into any other page, preventing SSO password phishing and credential reuse.
Action steps:
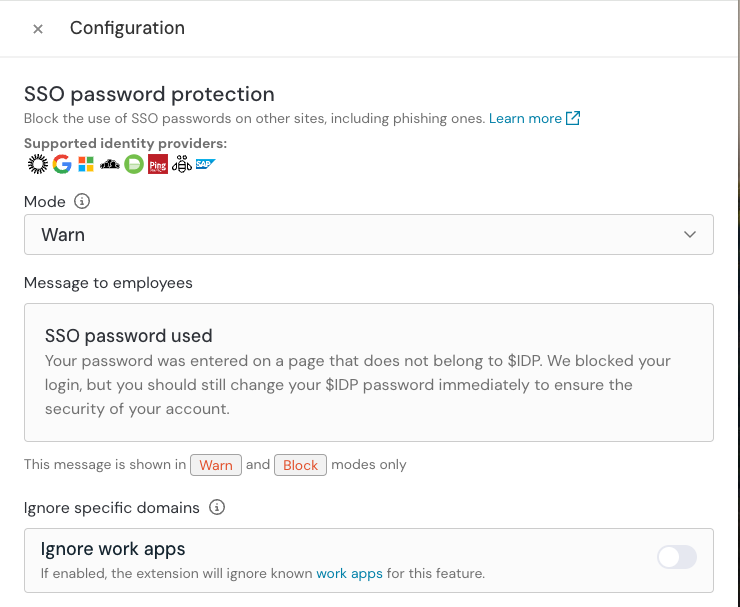
Select the SSO password protection tile on the Controls page.
Set the mode to Warn so test users can bypass the control if needed.
Make sure the Ignore work apps setting is disabled so you can test the control using the Push demo site.
Optional: Configure a custom Message to employees with your own text.
Note: In order to test SSO password protection, you’ll need to either use the Push demo site to register a test IdP credential or log in to your IdP so that the Push extension can observe your SSO password. We’ll cover this in Step 3 below.
Success state:
Configure app banners
Guide employees’ app usage using in-browser app banner messages. Select from a range of modes, from informing to blocking.
Action steps:
Select the App banners tile on the Controls page.
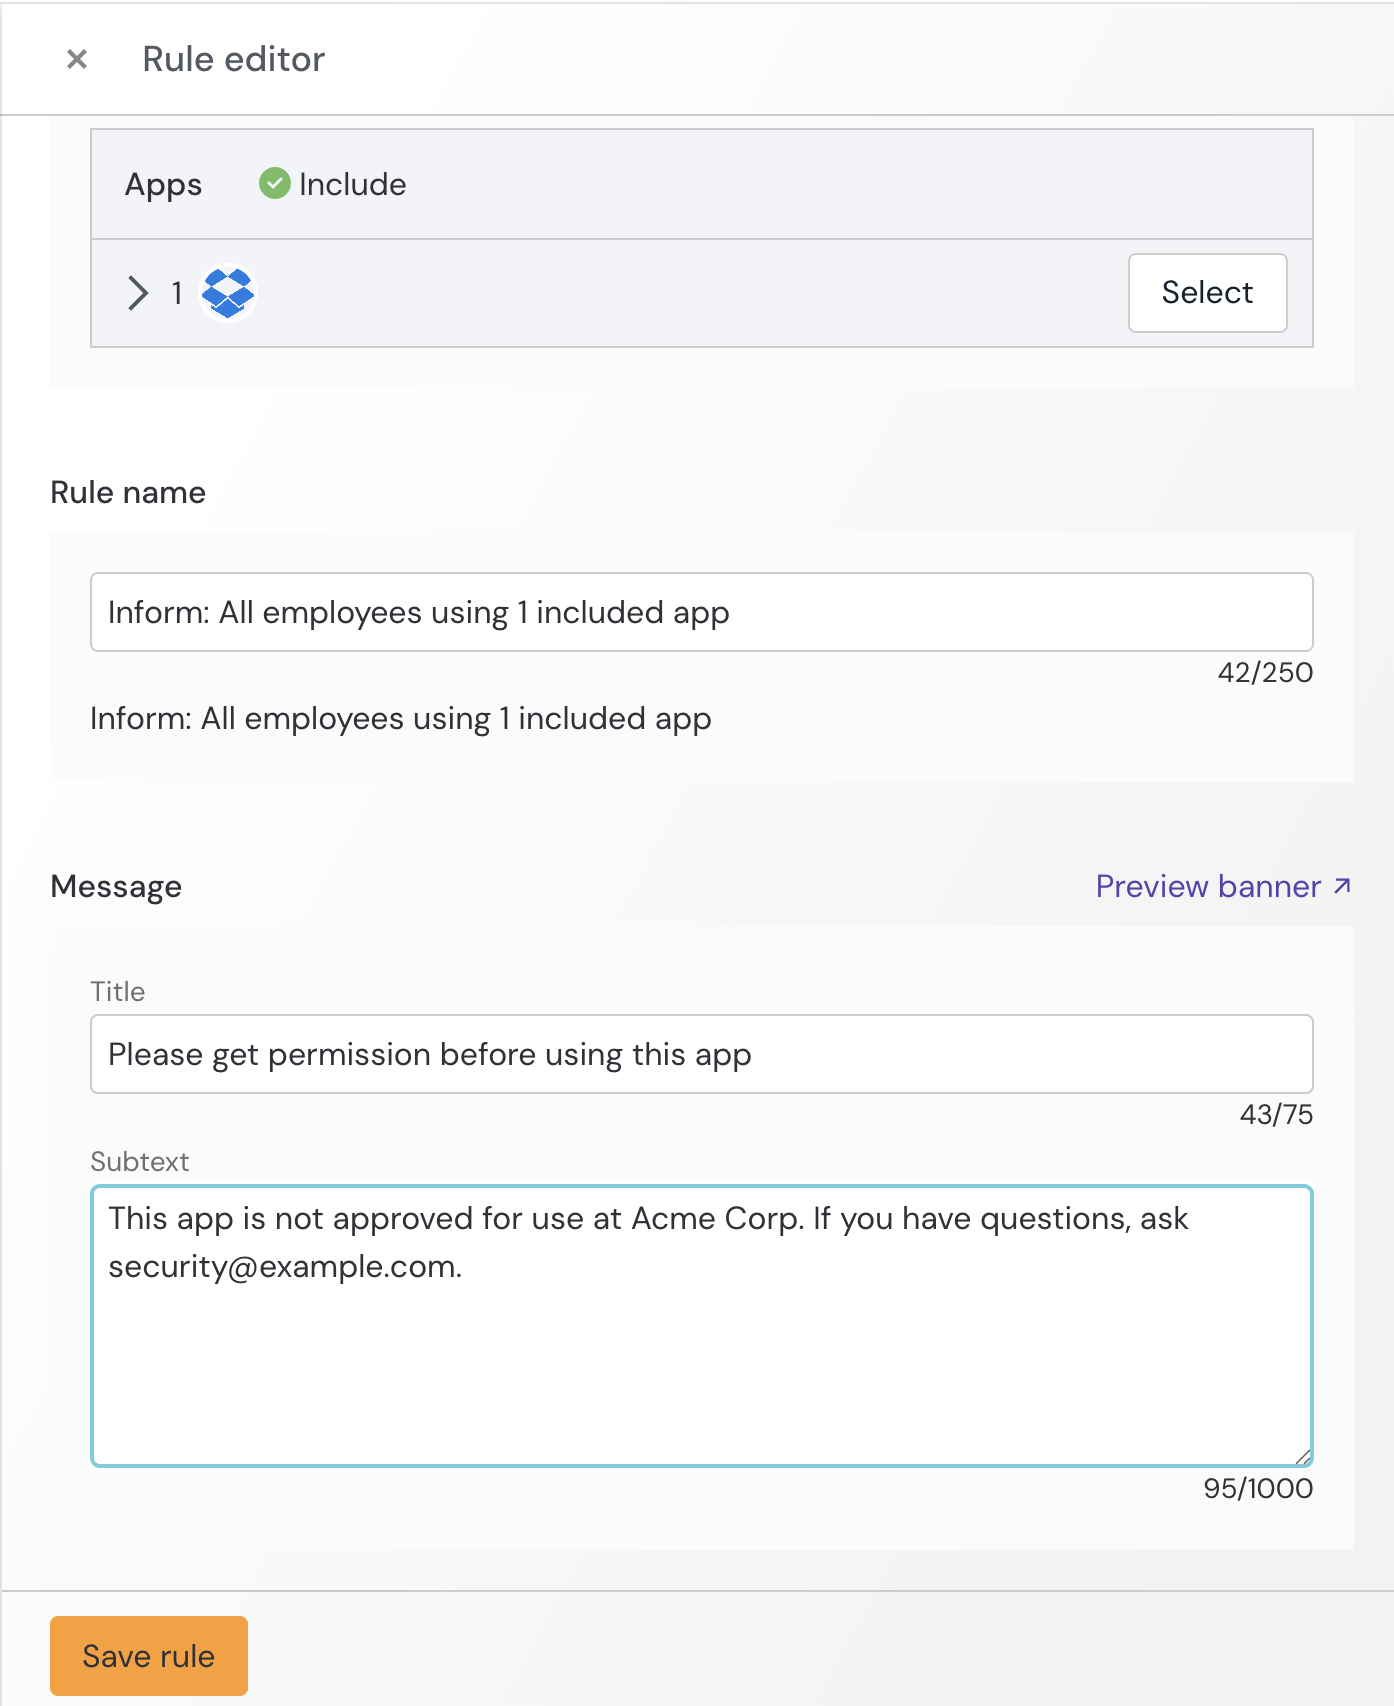
From the app banner slideout, select New app banner.
Choose an app you want to test a banner on. The banner will only display for users with the Push extension installed.
Set a banner in Inform mode.
Add your custom message.
Success state:
Configure URL blocking
You can use Push to block URLs and display a custom message to employees.
Action steps:
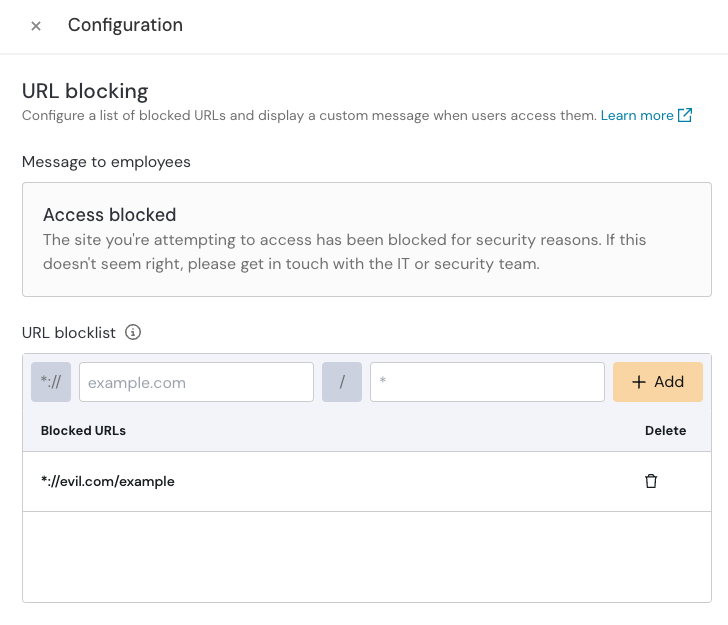
Select the URL blocking tile on the Controls page.
Add a URL to the blocklist. The URL will only be blocked for users with the Push extension installed.
Optional: Configure a custom Message to employees with your own text.
Success state:
Step 3: Test security controls
Now let’s test the security controls you configured. You should perform your testing in your enrolled browser so the extension can do its job!
Test phishing tool detection and SSO password protection
To test Phishing tool detection and SSO password protection, we’ll use the Push demo site to make it convenient. The Push demo site features modules for testing these two controls, simulating real-world phishing attacks without needing to visit an actual malicious site.
Note: The demo site registration form does not create an account or submit credentials anywhere. However, the Push extension will recognize this demo page as an identity provider so that you’ll be able to see data in the Push admin console based on your activity on the demo site. If you prefer to test with your actual SSO password, you’ll just need to have performed a login to your IdP in your enrolled browser so that your password can be observed by the extension.
Action steps:
Register for a test account on the Push demo site by going to https://idp.pushdemos.com.
Enter the email address you use as an enrolled user in Push and then enter a weak password (such as password123).
Why a weak password? So you can test account security findings in a later step. From the demo site, select the Evilginx or EvilNoVNC tiles to test phishing tool detection.
From the demo site, select the SSO password tile and enter the email address and password that you entered on the IdP registration page.
Success state:
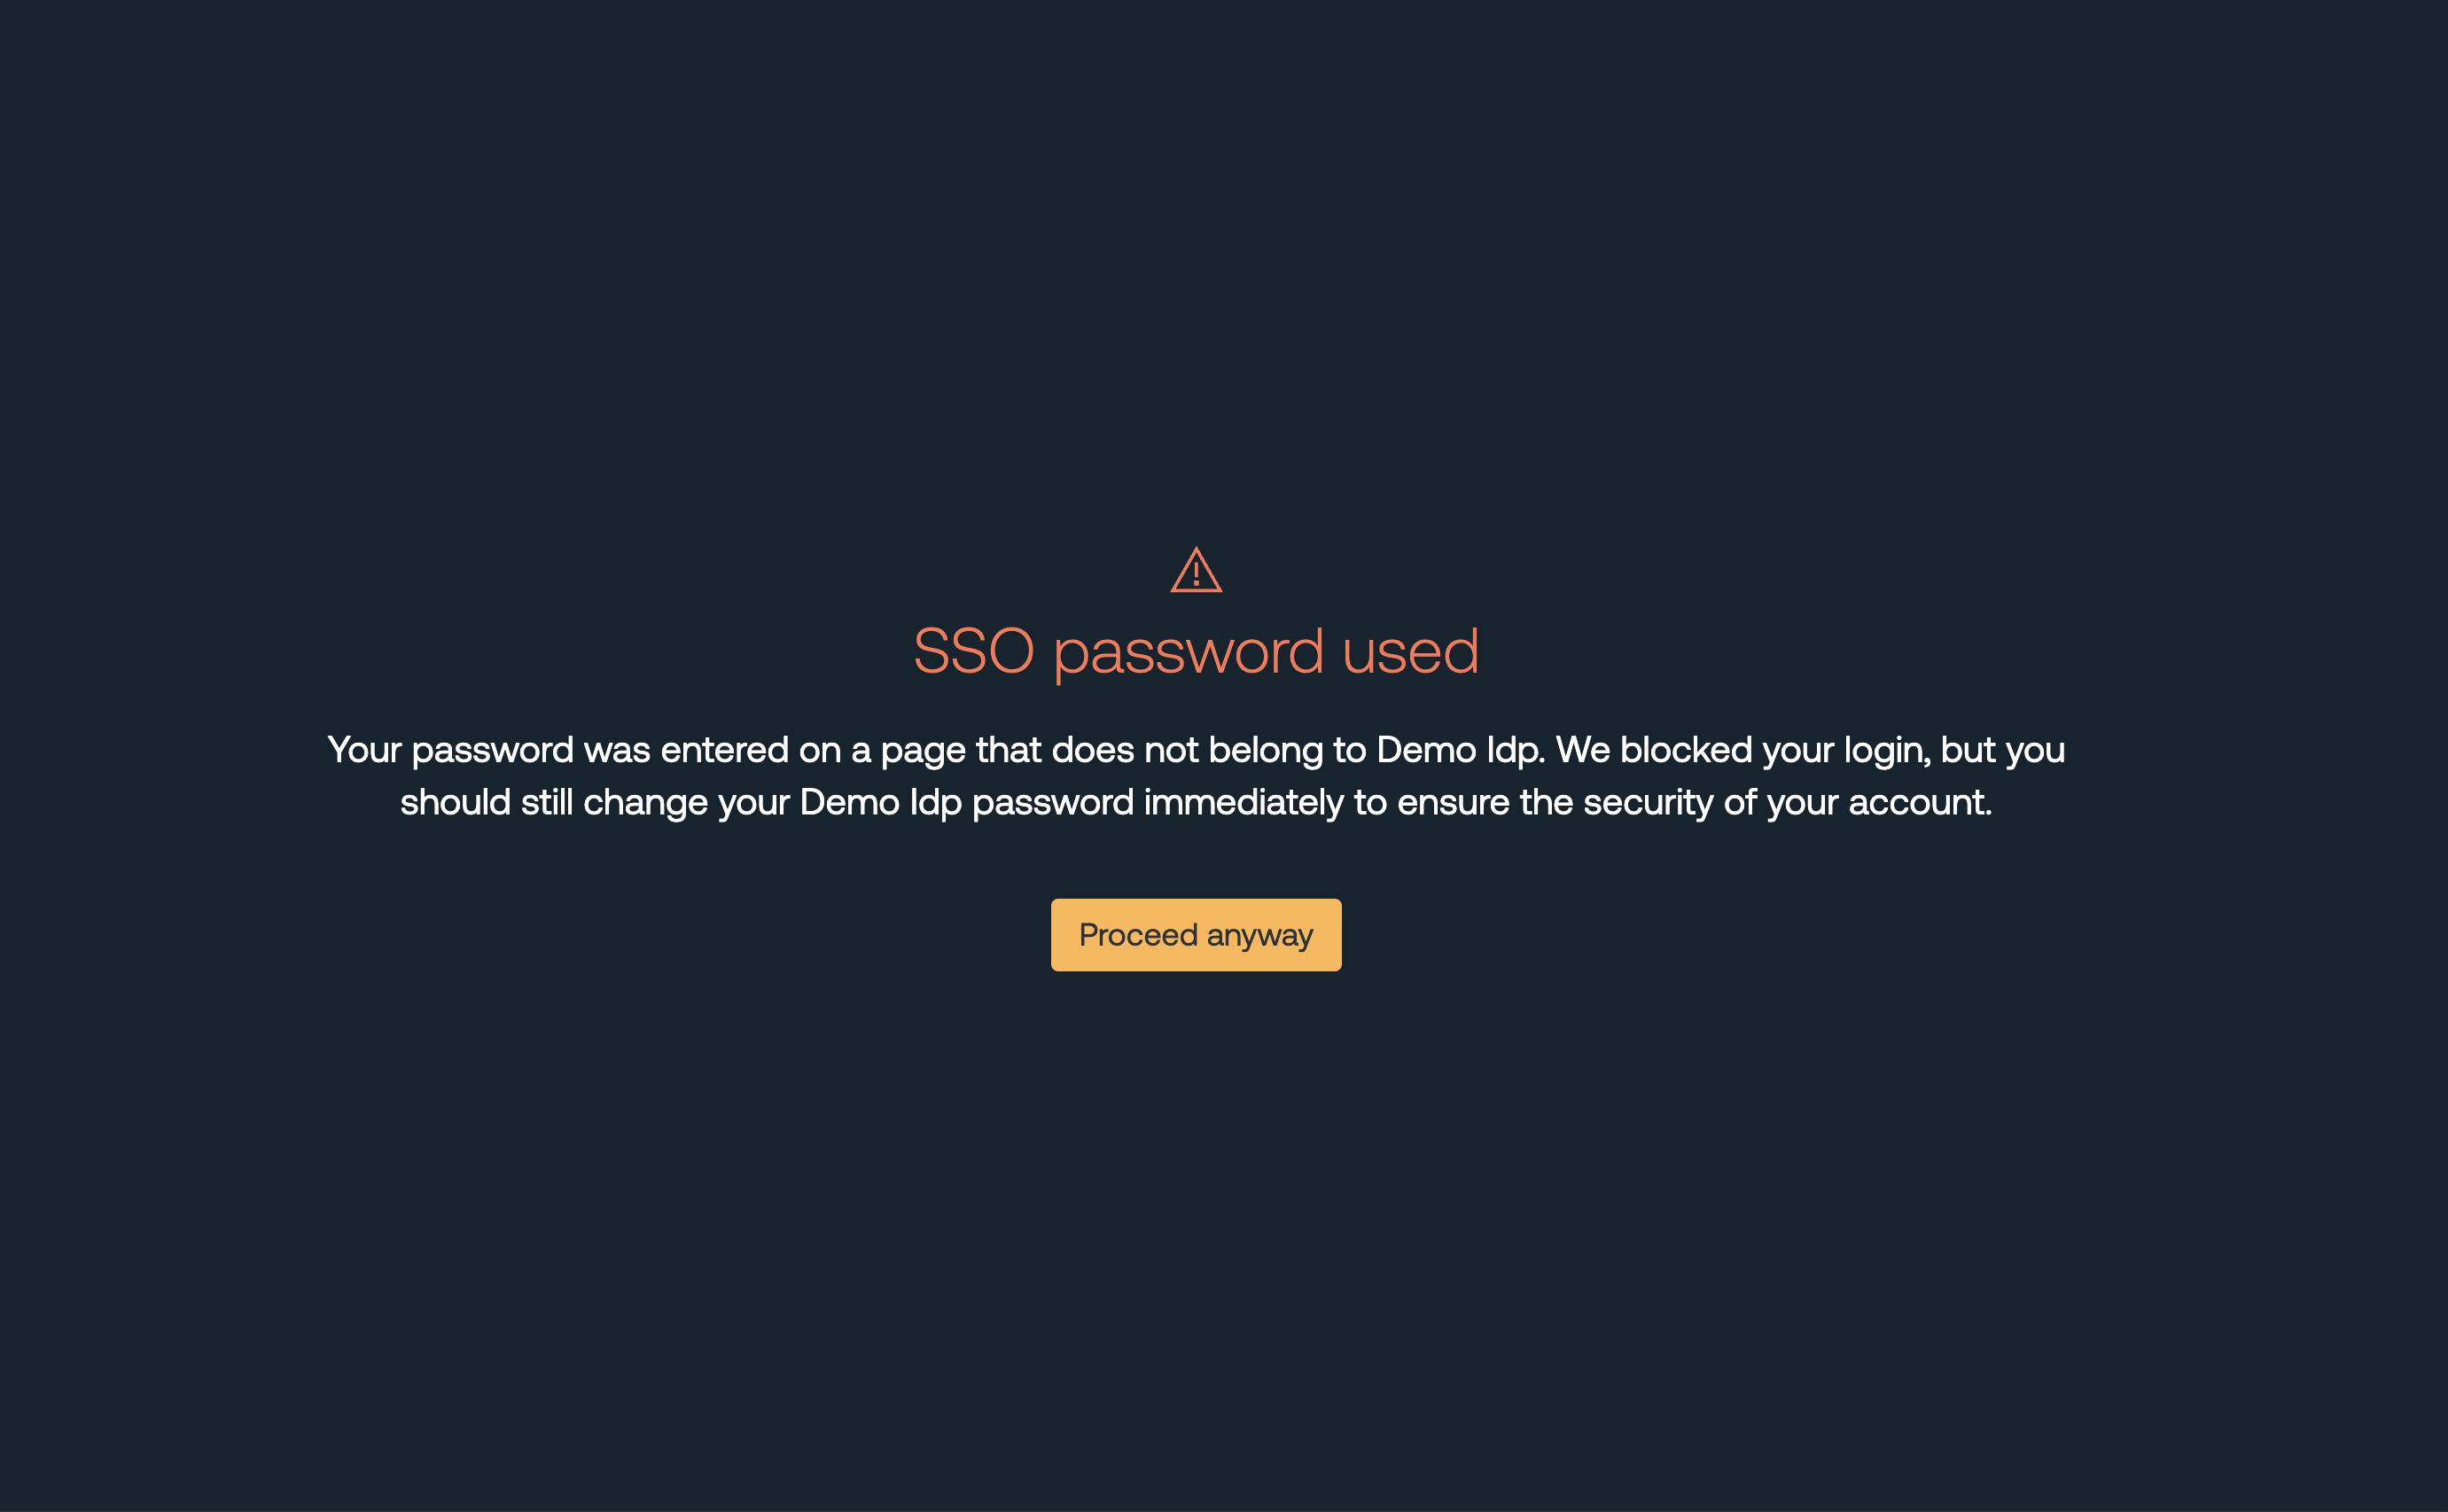
For phishing tool detection, you should see a warning page with your custom message (if configured) because the Push extension has detected phishing toolkit signatures.
For SSO password protection, you should see a warning page with your custom message (if configured).
Test app banners
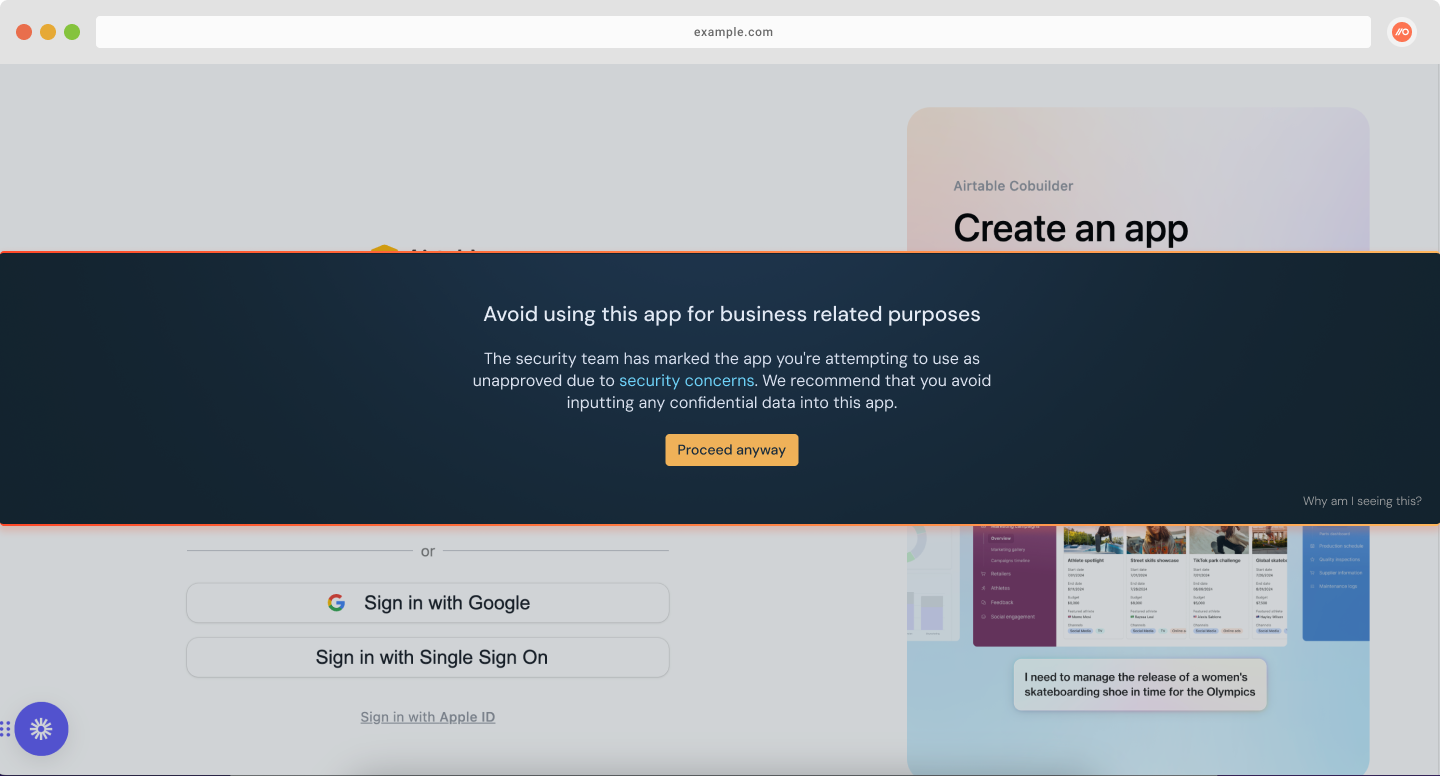
Test the app banner(s) you configured in step 2 by going to the signup or login pages for those apps.
Action steps:
Navigate to the signup or login pages for the app you configured an Inform banner for.
Go back to the Controls page in the admin console and change the Mode to another selection, such as Acknowledge or Reason.
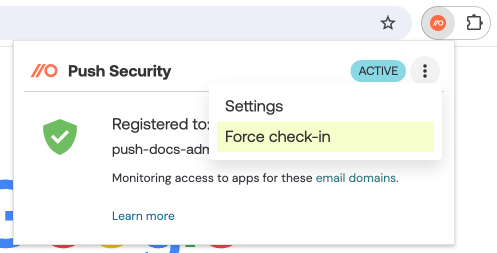
Force your extension to check in to receive your updated configuration settings. You can force a check-in by selecting the three dots from the extension tray and choosing Force check-in.
Then refresh the app signup or login page you visited to see the new banner mode.
Note: Changes to control configurations can take up to 30 minutes to populate across all enrolled extensions. If you’re testing multiple modes of the app banner feature in a short period of time, you can use the Force check-in option accessible from the Push extension tray to ensure that the new banner mode is visible.
Success state:
You should see your app banner display on screen.
Test URL blocking
To test URL blocking, visit the URL you entered in step 2. You should see a block page with your custom message (if configured).
Step 4: View event logs
After you’ve completed some testing, you can view the webhook events captured in Push as controls were triggered. This will give you a sense of the kind of telemetry you can collect with Push.
Note: The Events page shows only the last 7 days of activity. You can send Push events to your SIEM, SOAR, or other monitoring platform using the Push REST API and webhooks to collect more data.
Action steps:
In the admin console, go to Events.
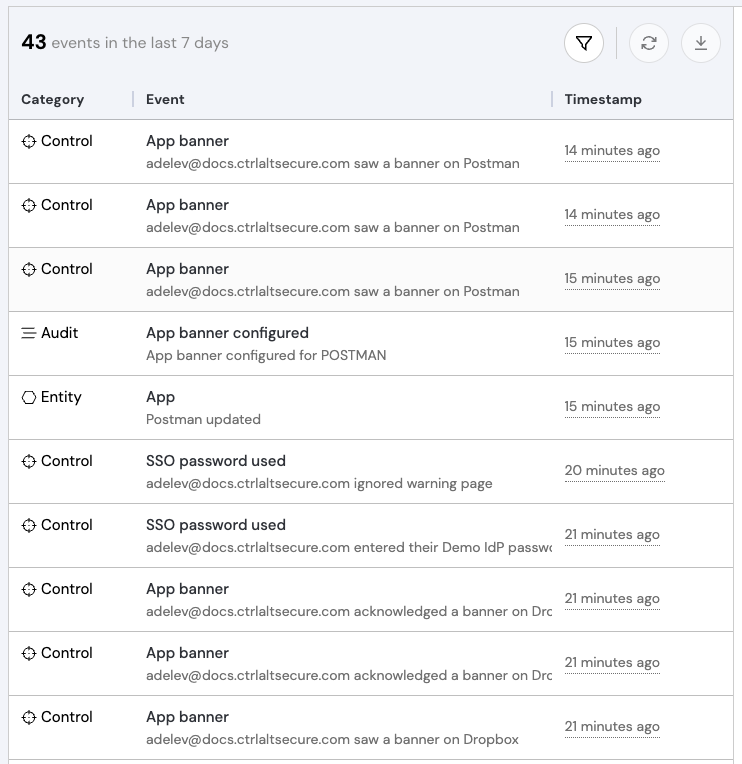
Scroll through the recent events, or filter them by selecting the filter icon, then select the Events section of the filter and change the By category filter to By type.
Choose a control that you tested and filter to see those events.
Success state:
You should see recent events based on your testing.
Click on an event to see Event details.
Step 5: Check for account security findings
If you used a weak password when signing up on the Push demo site in step 3, you can now see how Push identifies account security findings as the extension observes login activity.
Action steps:
Go to the Accounts page and find your Demo IdP account that you created in step 3.
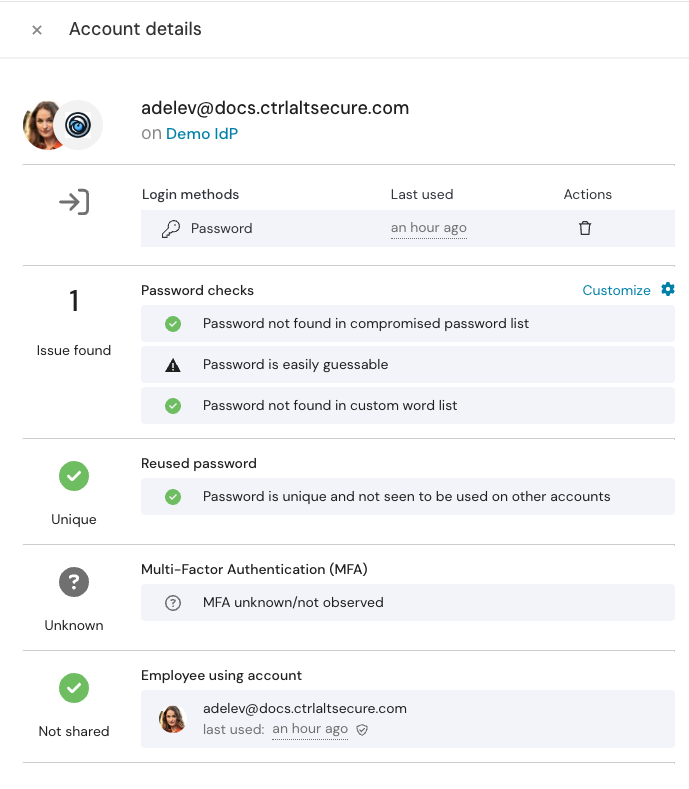
Click on the account to view the slideout with details on the security issues Push found (a weak password, for example).
If Push has already observed other accounts based on your login activity in your enrolled browser, you’ll also see those on the Accounts page.
Success state:
You should see a security issue for weak password on your Demo IdP account.
Step 6: Organize your apps
Finally, use the metadata features in Push to organize the apps that Push has discovered, such as the Demo IdP app. You can set an Owner, apply an Approval status or Sensitivity level label, or add your own custom Labels to help organize the list of apps.
The metadata you apply will allow you to filter the apps and accounts in Push to make the information actionable.
Action steps:
Go to the Apps page and search for the Demo IdP app.
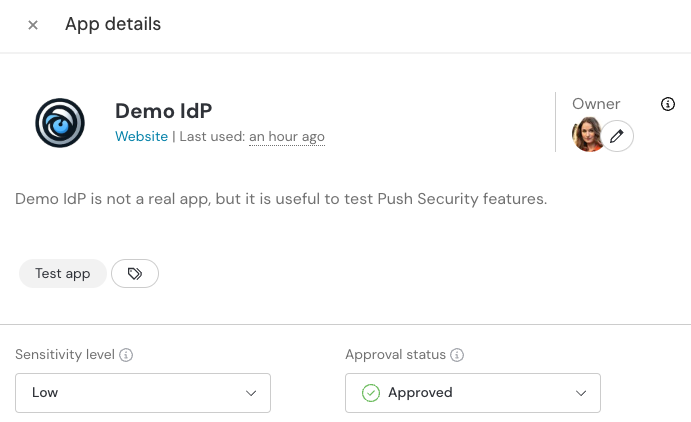
Set an Owner, a Sensitivity level and an Approval status.
Set some custom Labels.
Then click on the filter icon on the Apps page and filter by one of the metadata categories you applied, such as Approval status.
Success state:
You should see your app appear based on your filter selection and the metadata you added.
Need help?
If you need any help with testing or have questions about Push, we’re happy to help. Contact us or book a demo.